What is OBS
OBS is the most popular streaming solution today, with millions of users around the world. It’s easy to customize to your needs and also functions as a highly efficient camera splitter software.
In this article, we’ll guide you through the setup process for streaming on Soulcams.
Where to download
You can download the latest version of OBS from here:
Currently, OBS is only available for desktop devices running Windows, macOS, and Linux.
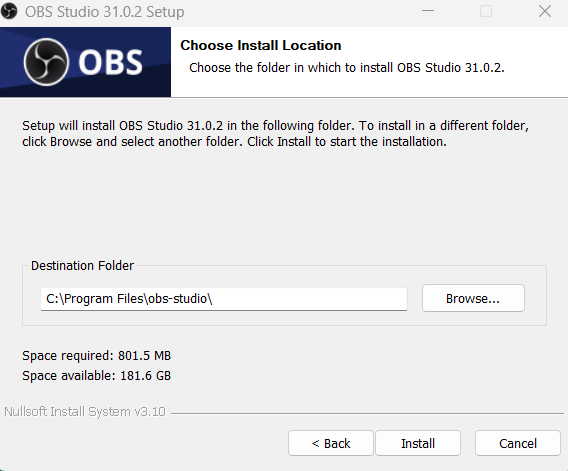
Installation
Installation is straightforward. Simply open the downloaded installer, choose the install location, click ‘Install,’ and you’re good to go.
How to set your base & scaled resolution
Once installation has finished, click ‘Settings’ in the main window of OBS, then select the ‘Video’ tab on the left. Set your base (Canvas) resolution to match your monitor’s native resolution. Set your output (Scaled) resolution to either 1280×720 or 1920×1080, depending on which resolution you’d like to stream with. Hit ‘Apply’ and ‘OK’ at the bottom.
How to add your camera
Click the ‘+’ icon on the ‘Sources’ tab and select ‘Video Capture Device.’ Then, click ‘OK’ in the pop-up window.
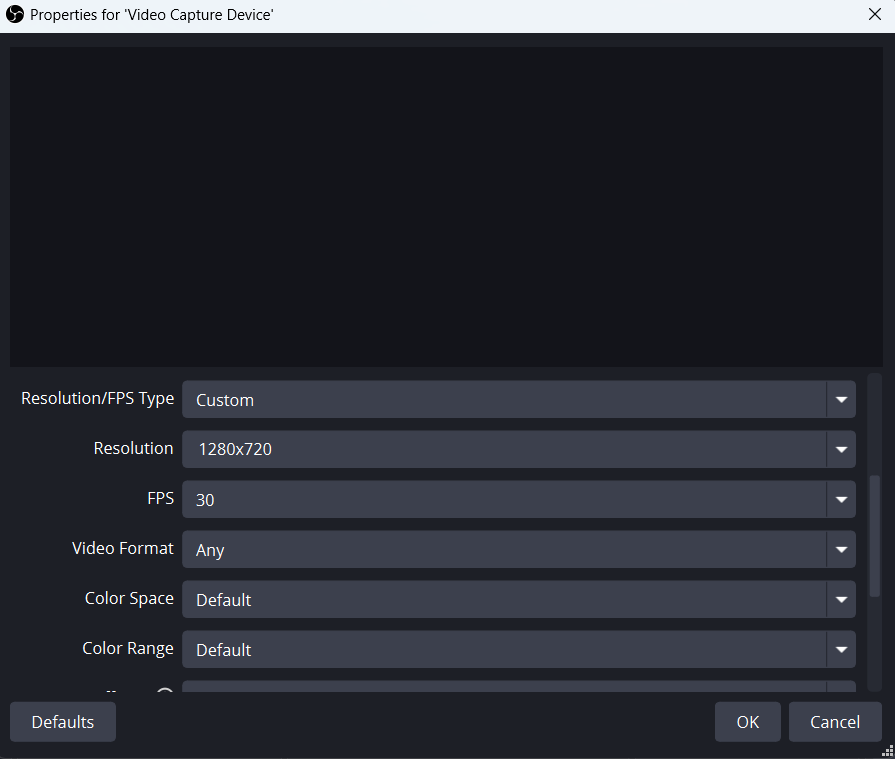
Another window will appear, where you can select your webcam from the ‘Device’ dropdown menu at the top. In my case, it’s the ‘Lovense Camera’.
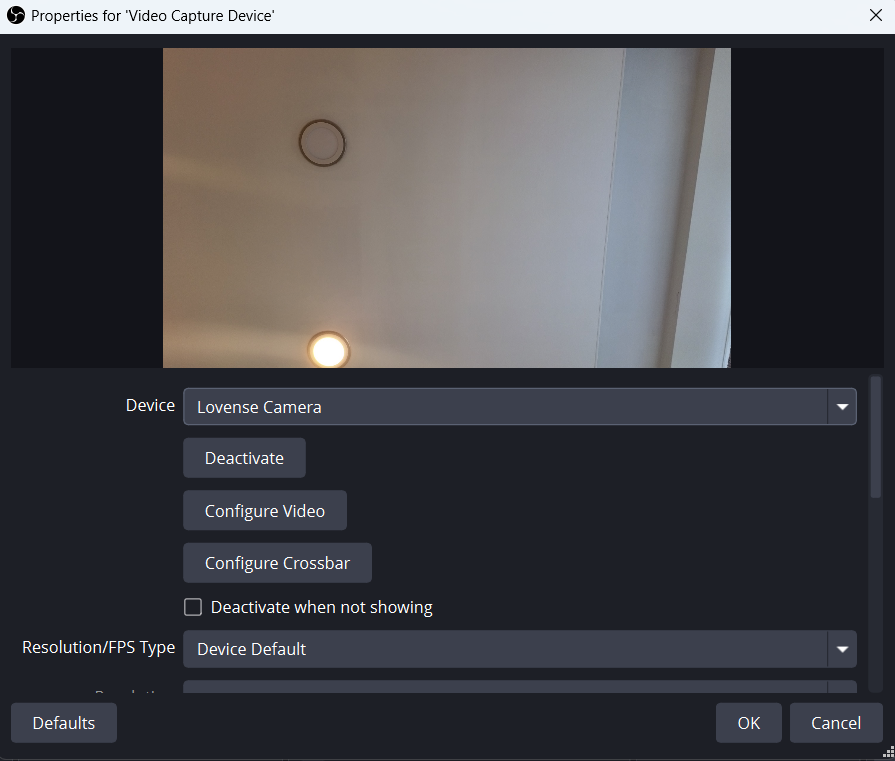
Scroll down a bit and select ‘Custom’ in the ‘Resolution/FPS Type’ section. You can then enter either 1280×720 or 1920×1080, depending on the resolution you’d like to stream with.
IMPORTANT: Soulcams currently only supports streaming in resolutions of 1280×720 and 1920×1080!
Enter ’30’ in the ‘FPS’ field, and hit ‘OK’.
How to set up your microphone
OBS detects your microphone by default. In the ‘Audio Mixer’ box, you’ll see a ‘Mic/Aux’ option with a VU meter (the bar with green, yellow, and red indicators). If there’s activity on the bar, your microphone is detected. If there’s no activity, your mic may be muted, or you might not have a microphone connected to your computer (though most webcams come with a built-in microphone these days). Click the gear icon at the bottom of the ‘Audio Mixer’ box, and make sure to check ‘Mono’ in the ‘Mic/Aux’ row.
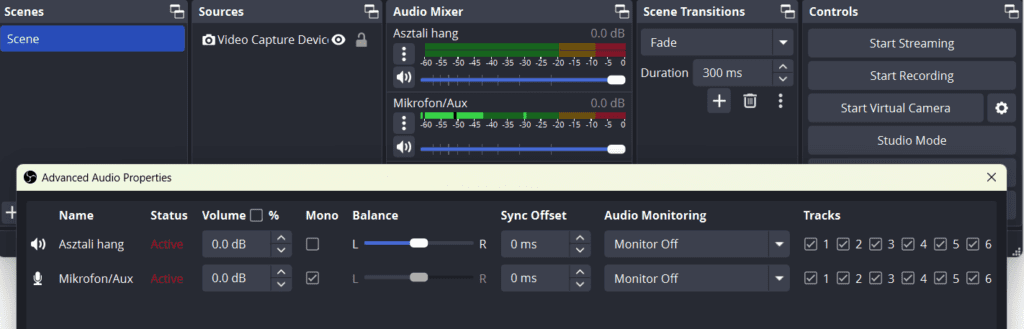
In the ‘Settings’ menu, go to the ‘Audio’ tab. Ensure that the ‘Sample Rate’ is set to 48kHz; there’s no need to adjust anything else here.
Output
Navigate to the ‘Output’ tab in the ‘Settings’ menu. Set ‘Output Mode’ to ‘Advanced’ at the top.
Rate Control: set this one to constant bitrate (CBR).
Bitrate:
- if you’re streaming in 1280×720, enter a value between 2000-2500 here.
- if you’re streaming in 1920×1080, enter a value between 4000-5000 here.
Keyframe interval: set this to 2 seconds (2 s)
Profile: set this to ‘High’ or ‘Main’
Tune: set this one to ‘zerolatency’
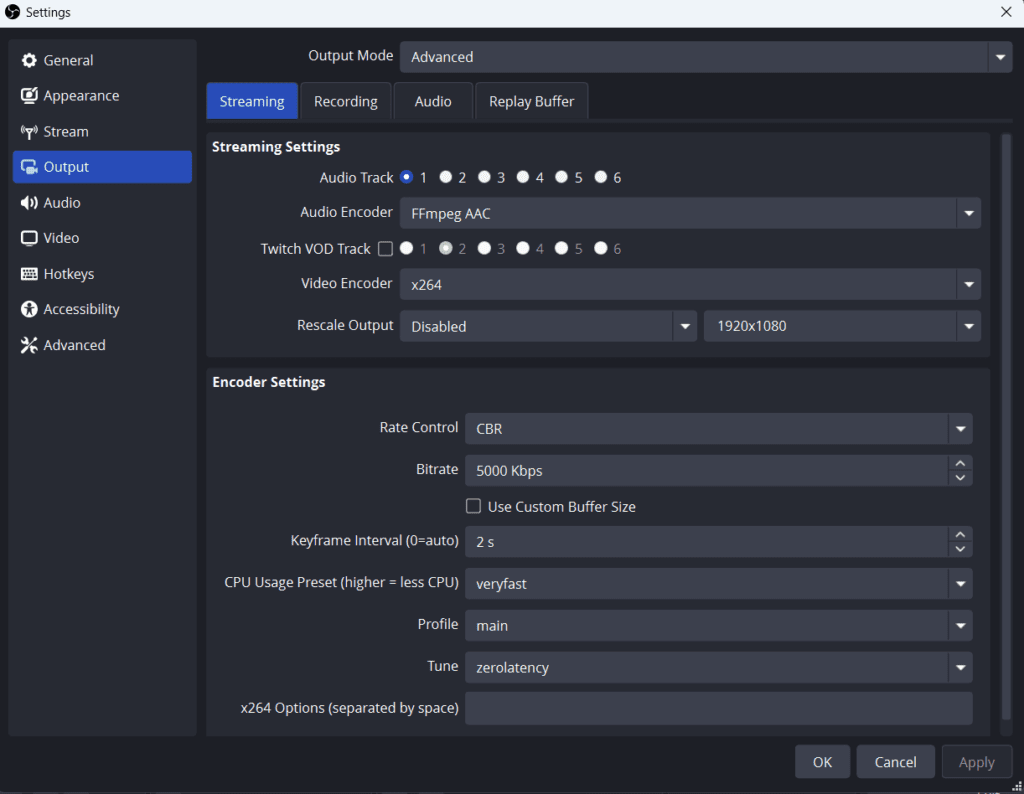
Video Encoder: Set this to H.264 for hardware encoding (NVIDIA, AMD graphics cards, Intel onboard graphics) or x264 for software encoding. While software encoding provides the best stream quality, it is more taxing on the CPU compared to hardware encoding solutions.
If you have a relatively modern dedicated video card in your system (e.g., NVIDIA GTX 1050 Ti or higher, AMD RX 5000 series or higher), or an Intel CPU with onboard graphics, then it’s worth switching to hardware encoding. This is especially useful for multicammer models (those who stream to multiple sites at once) and for models with less powerful CPUs.
More on encoders in the following article:
Where to put your stream key & how to start streaming
When you log into your model profile and click the ‘Go Live’ button, you will be directed to the streaming dashboard.
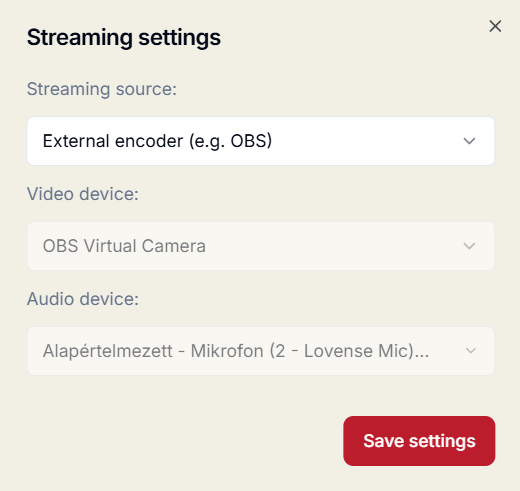
On the streaming dashboard, click ‘Settings’ at the top and select ‘External Encoder’ from the ‘Streaming Source’ dropdown menu, then click ‘Save Settings’ at the bottom.
A ‘Show RTMP/OBS Specifications’ button will appear in the streaming window.
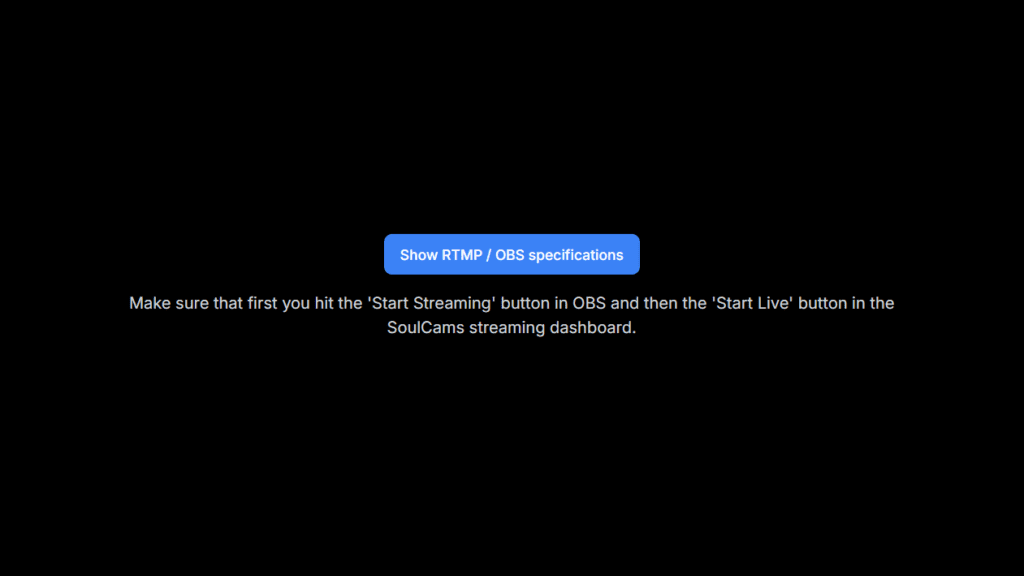
Clicking this button will open the ‘RTMP / OBS Settings’ window.
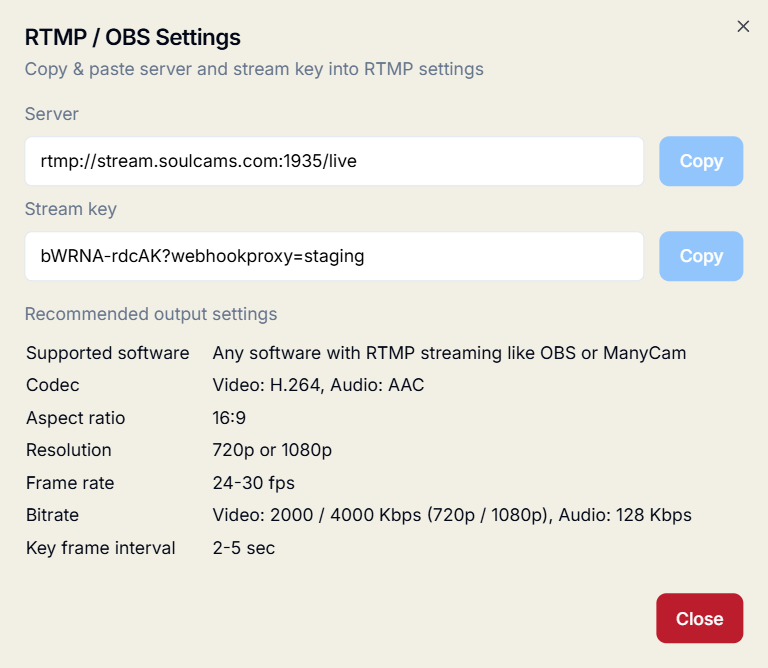
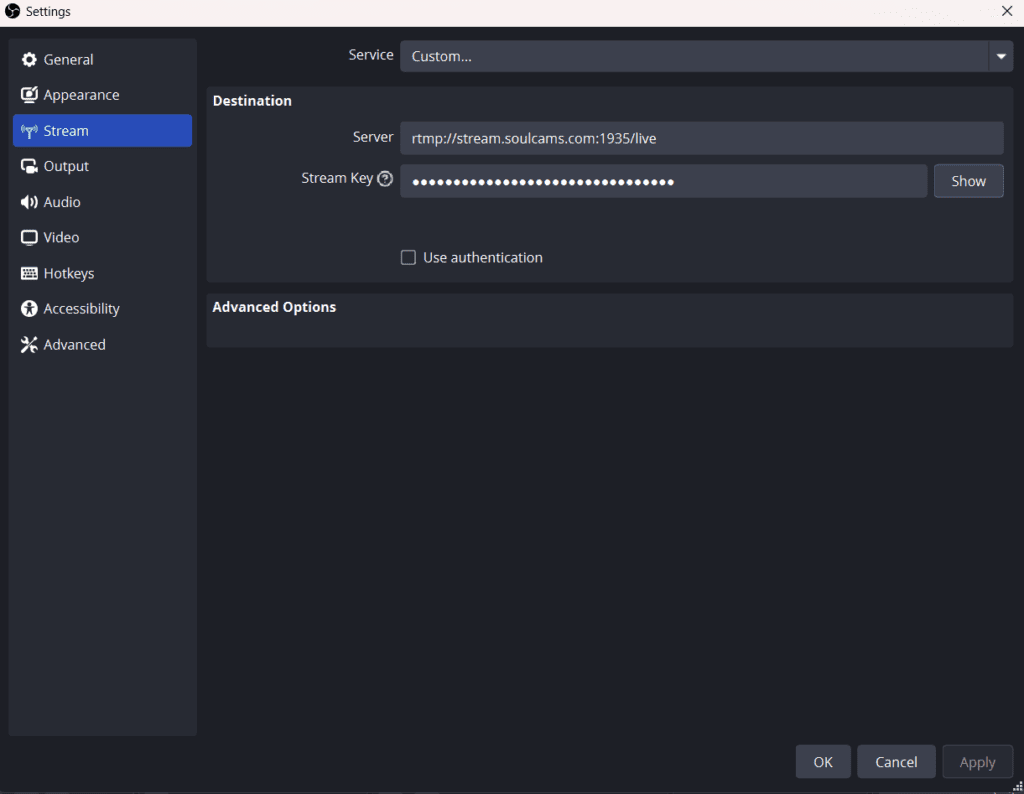
- Copy the URL found in the ‘Server’ field. Then, go to OBS -> Settings -> Stream, set the service to ‘Custom,’ and paste the copied URL into the ‘Server’ field.
- Copy the stream key found in the ‘Stream key’ field. Go to OBS -> Settings ->Stream, set the service to ‘Custom’ if you haven’t already, and paste the copied stream key into the ‘Stream Key’ field.
- Click ‘OK,’ then return to the main window of OBS.
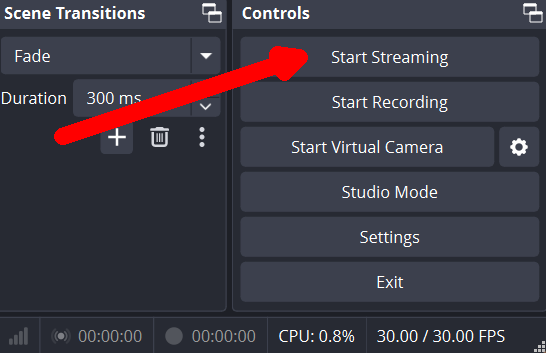
- Click ‘Start Streaming’ in the OBS window, and then ‘Start live’ in the Soulcams streaming dashboard.
If you’d like to stop your stream, hit the ‘Stop Streaming’ button.
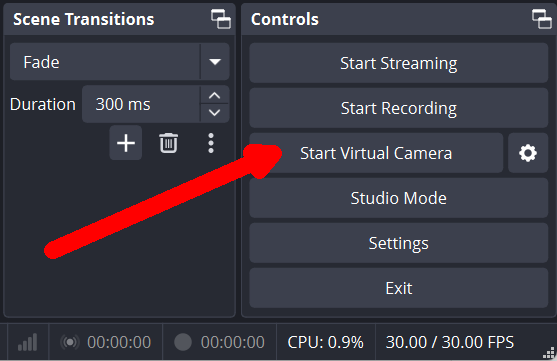
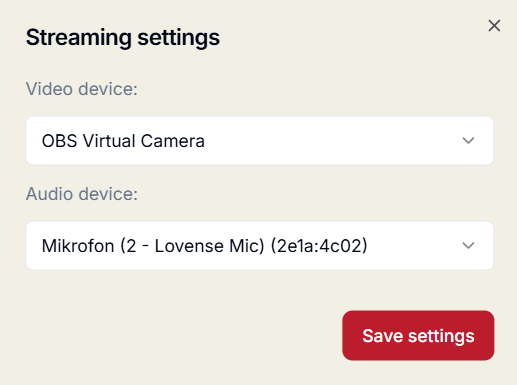
How to use OBS as a video splitter
If you’d like to use OBS as a video splitter only, without broadcasting to an RTMP server, simply click the ‘Start Virtual Camera’ button in the main window of OBS. Then, select ‘OBS Virtual Camera’ from the list of available video devices before going online on Soulcams, click ‘Save settings’ at the bottom.